
How to Install & Remove Fonts on a Mac
After you download a font, you still need to install it before you can use it in programs such as Microsoft Word. This tutorial shows you how to install a downloaded font with Font Book, check that it was installed correctly, and remove it later if you no longer want it.
Install a Font on a Mac
Find the downloaded font file
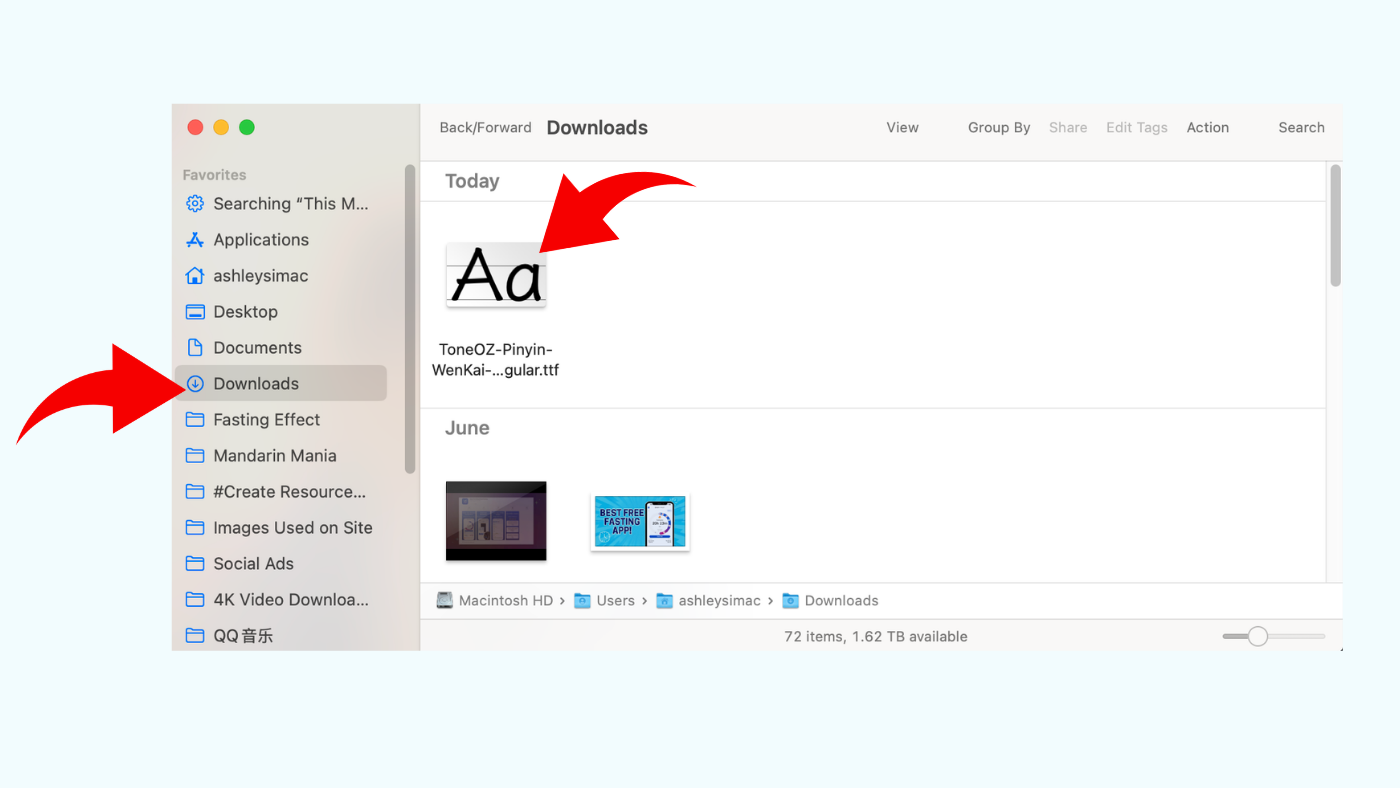
Open Finder and select Downloads in the sidebar. Find the font file you want to install.
If you saved the font somewhere else, open that folder instead. If the download is still inside a ZIP file, open the ZIP file first so you can access the font file inside. If you need help, see our How to Open a ZIP File tutorial.
Open the font in Font Book
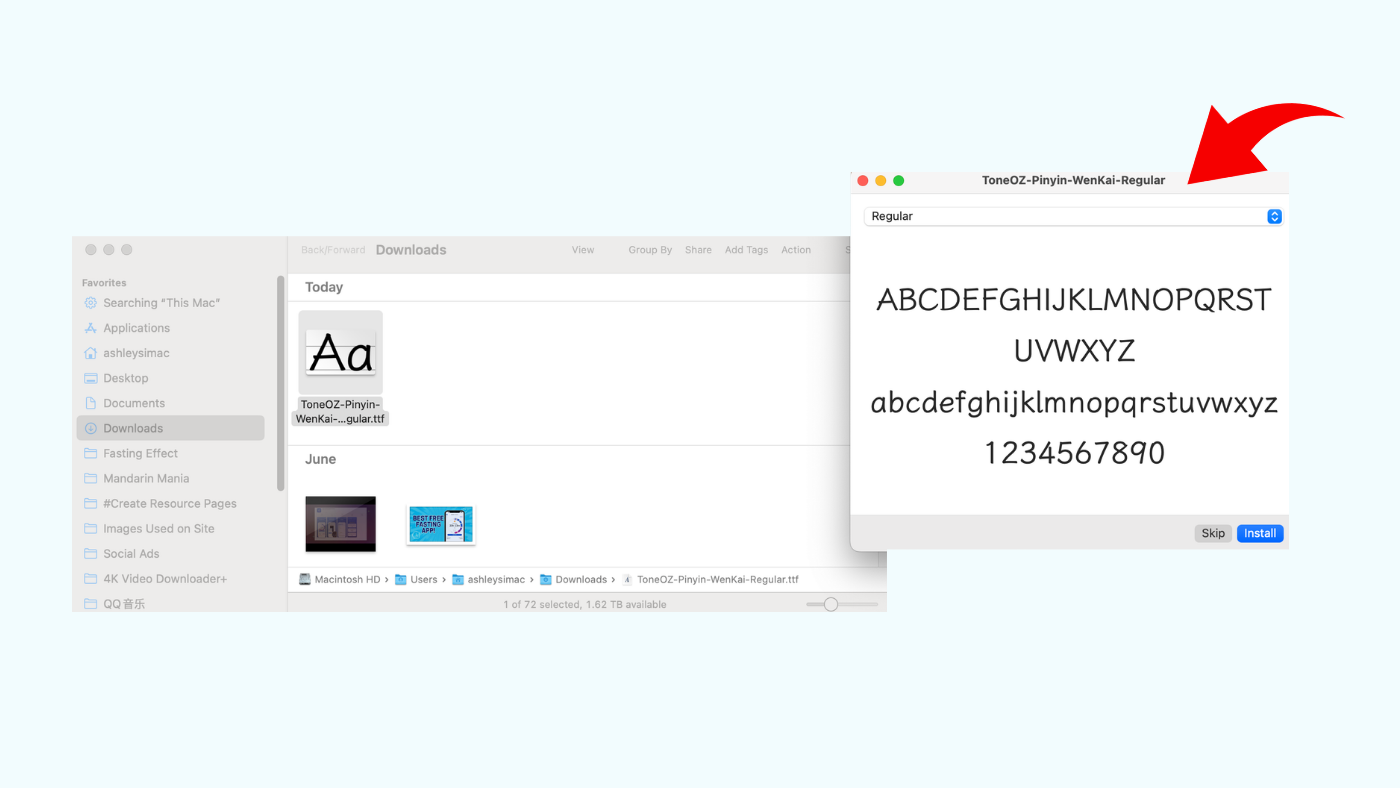
Double-click the font file to open it in Font Book. A preview window will appear so you can see the font before installing it.
Select Install to add the font to your Mac. Font Book will check the font during installation and let you know if it finds a problem.
Confirm that the font is installed
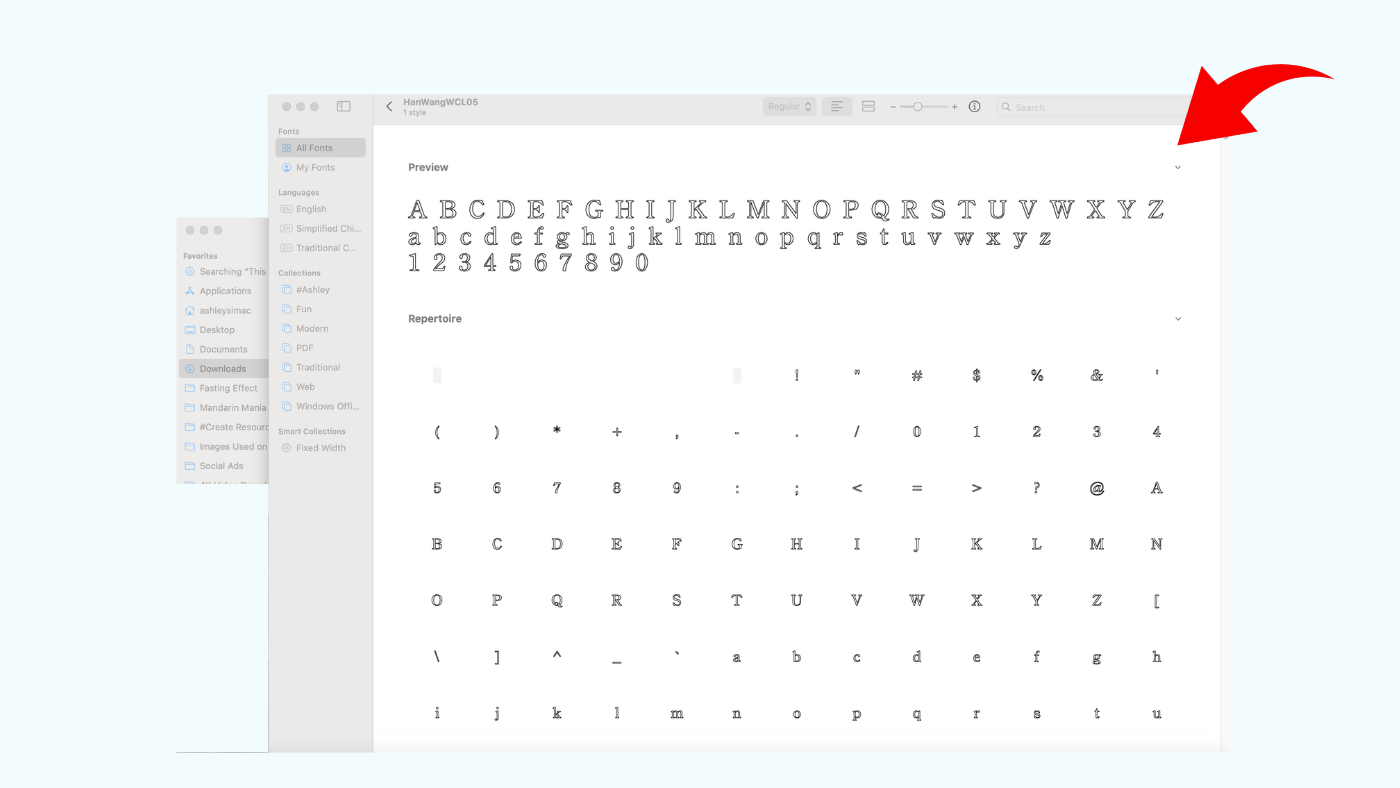
After the font is installed, it will appear in Font Book. This lets you confirm that the font was added successfully.
You can now close Font Book. The font should be available in apps that use the fonts installed on your Mac.
Check that the font is available in an app
Open an app that lets you choose fonts, such as Microsoft Word, Pages, or another word-processing program. Open the app’s font menu to view the available fonts.
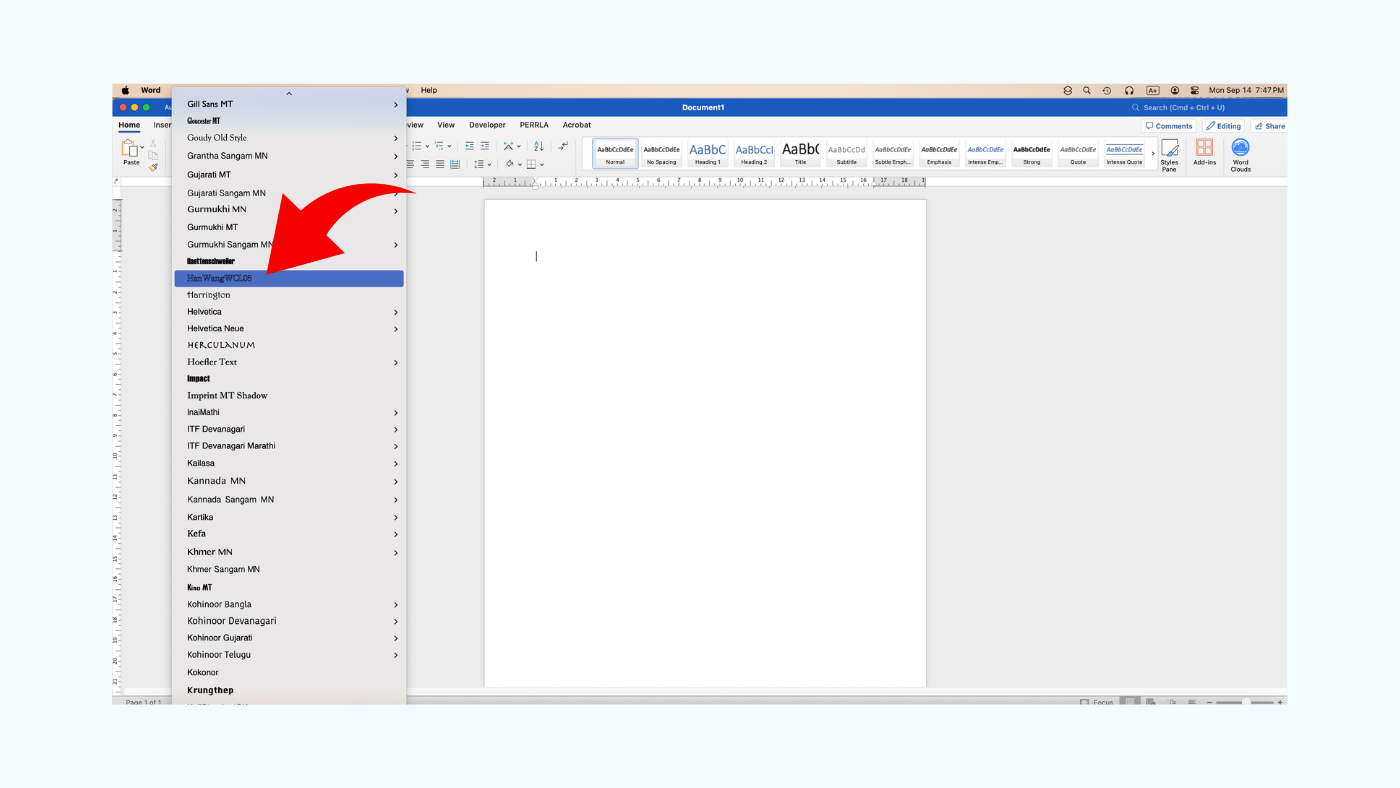
Look for the font you just installed. Scroll through the list, or search for the font by name if the app includes a search option.
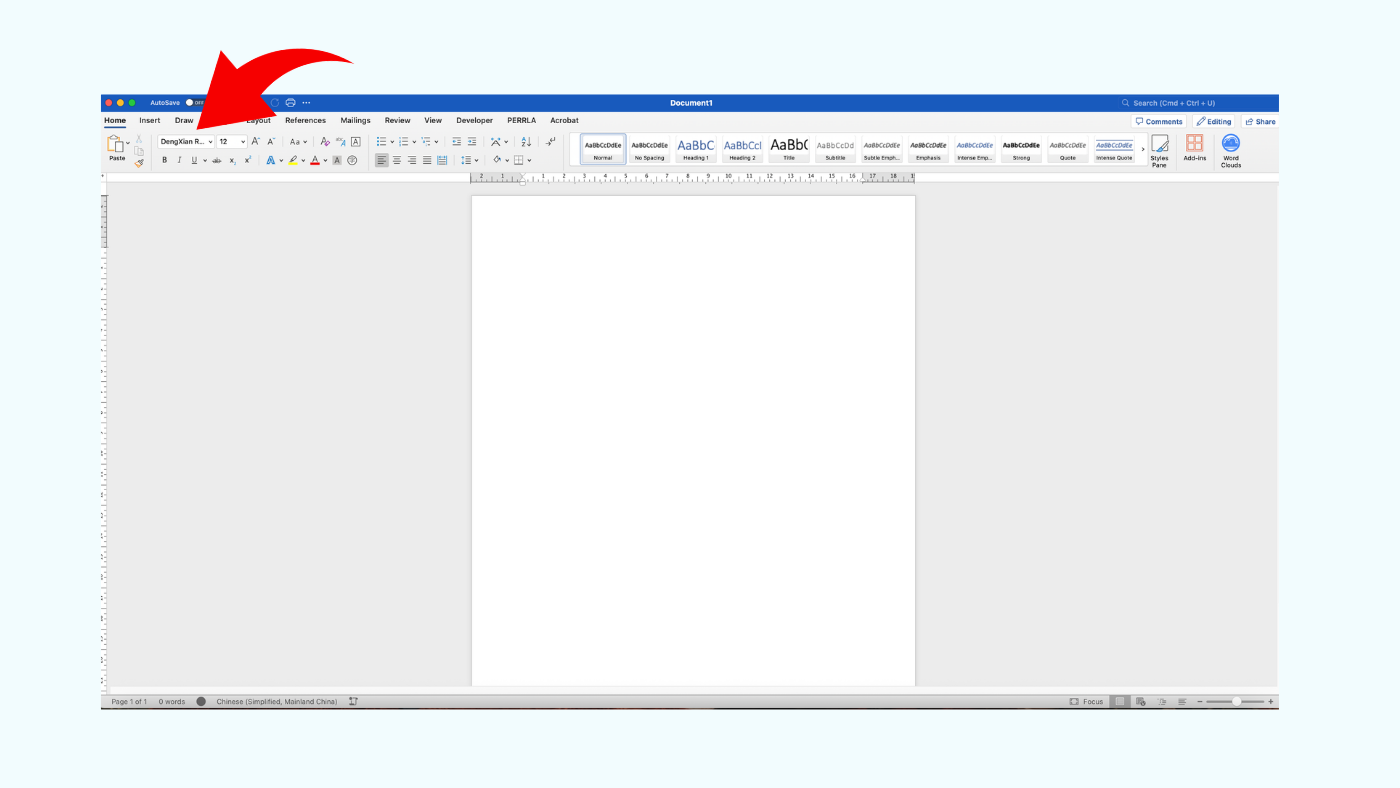
Select your new font
Find the font you installed and select it. You can now use the font in your document or project.
Don’t see the font? If the app was already open when you installed the font, close it and open it again. This may be needed for the app to refresh its font list.
Remove a Font from a Mac
Use Font Book when you want to remove a font you installed and no longer need.
Open Font Book
If your Mac has Launchpad, open it from the Dock and use the search box at the top of the screen to search for Font Book. Select Font Book to open it.
Using macOS Tahoe 26? Launchpad has changed in newer versions of macOS. Press Command + Space to open Spotlight, type Font Book, and press Return. You can also use this method on earlier versions of macOS.
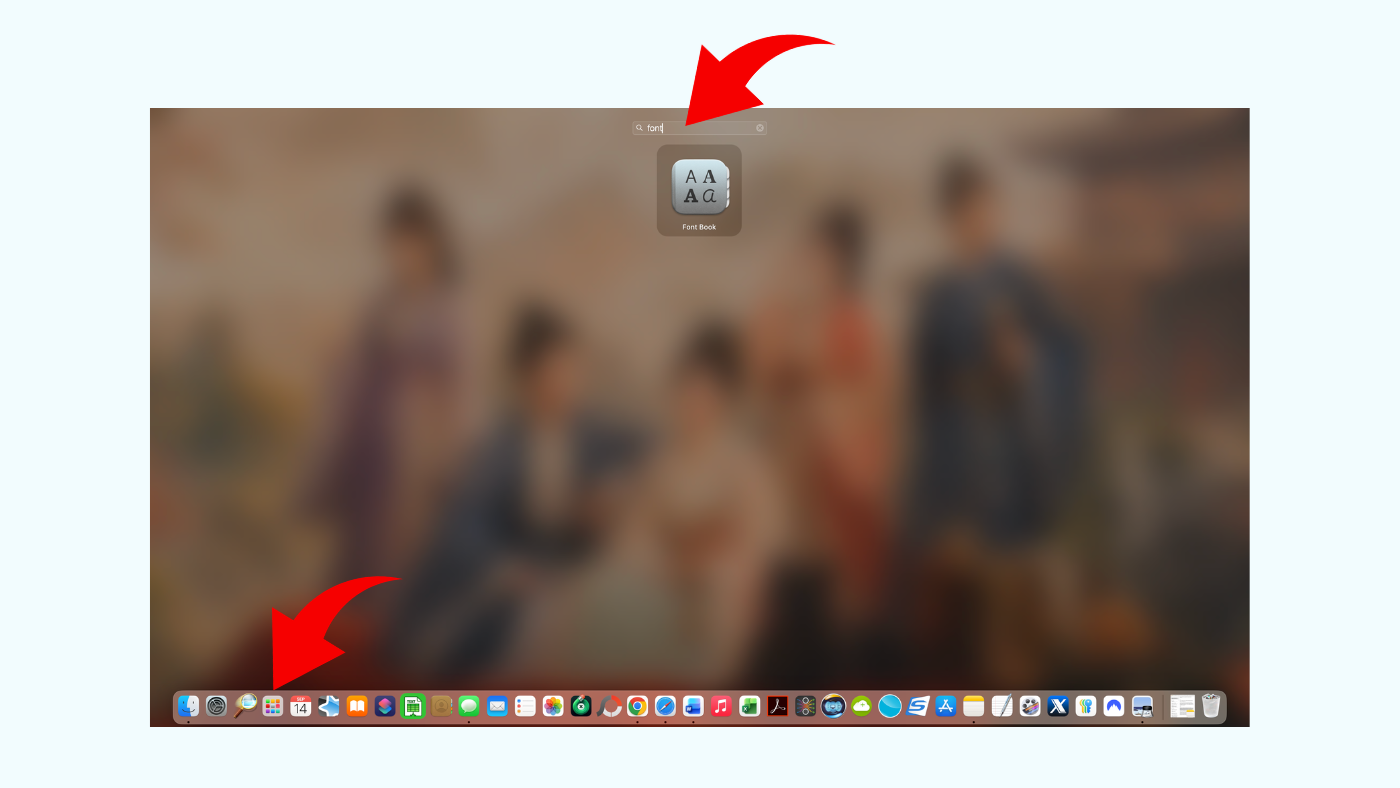
Find the font you want to remove
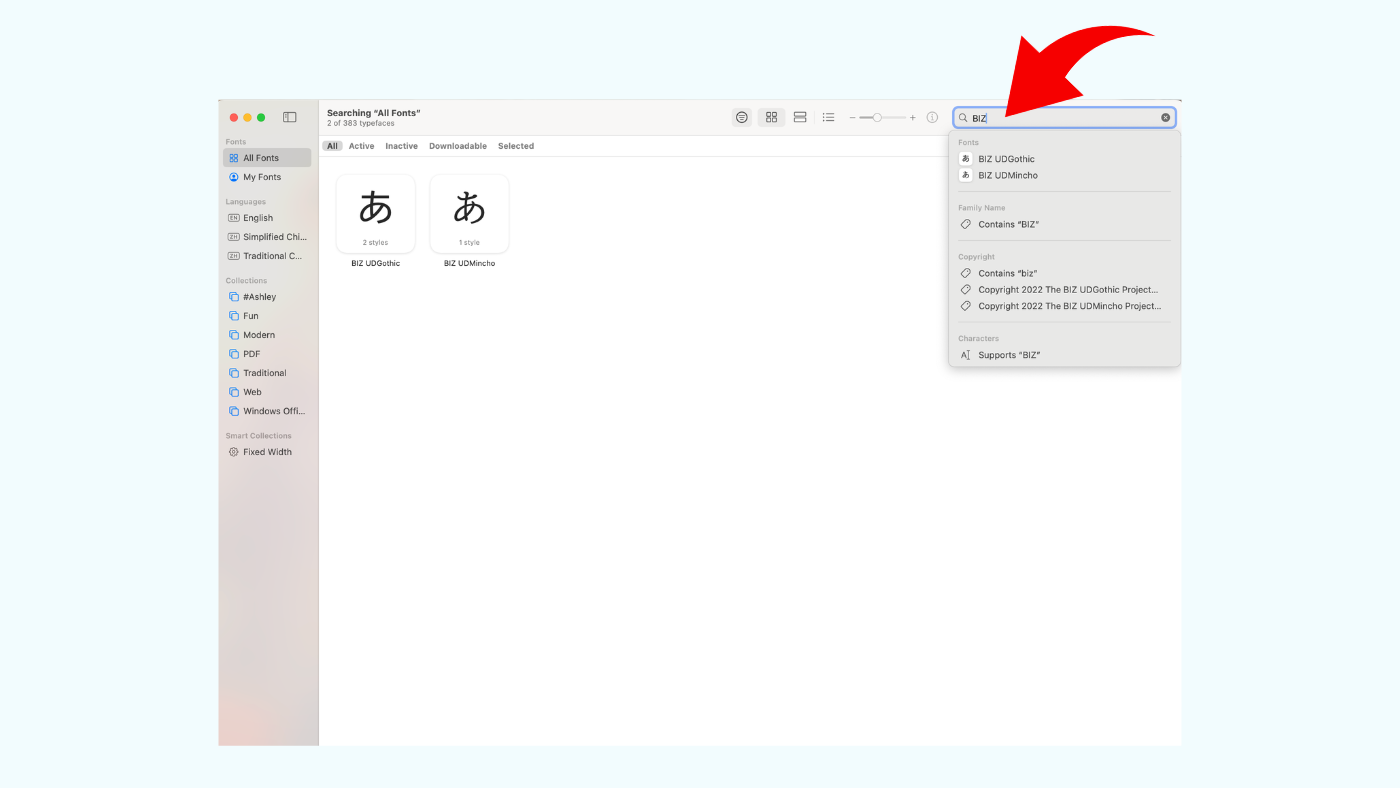
Use the search box in Font Book to find the font you want to remove. Type the font name, then select it when it appears in the results.
Before removing it, make sure you have selected the correct font.
Choose Remove
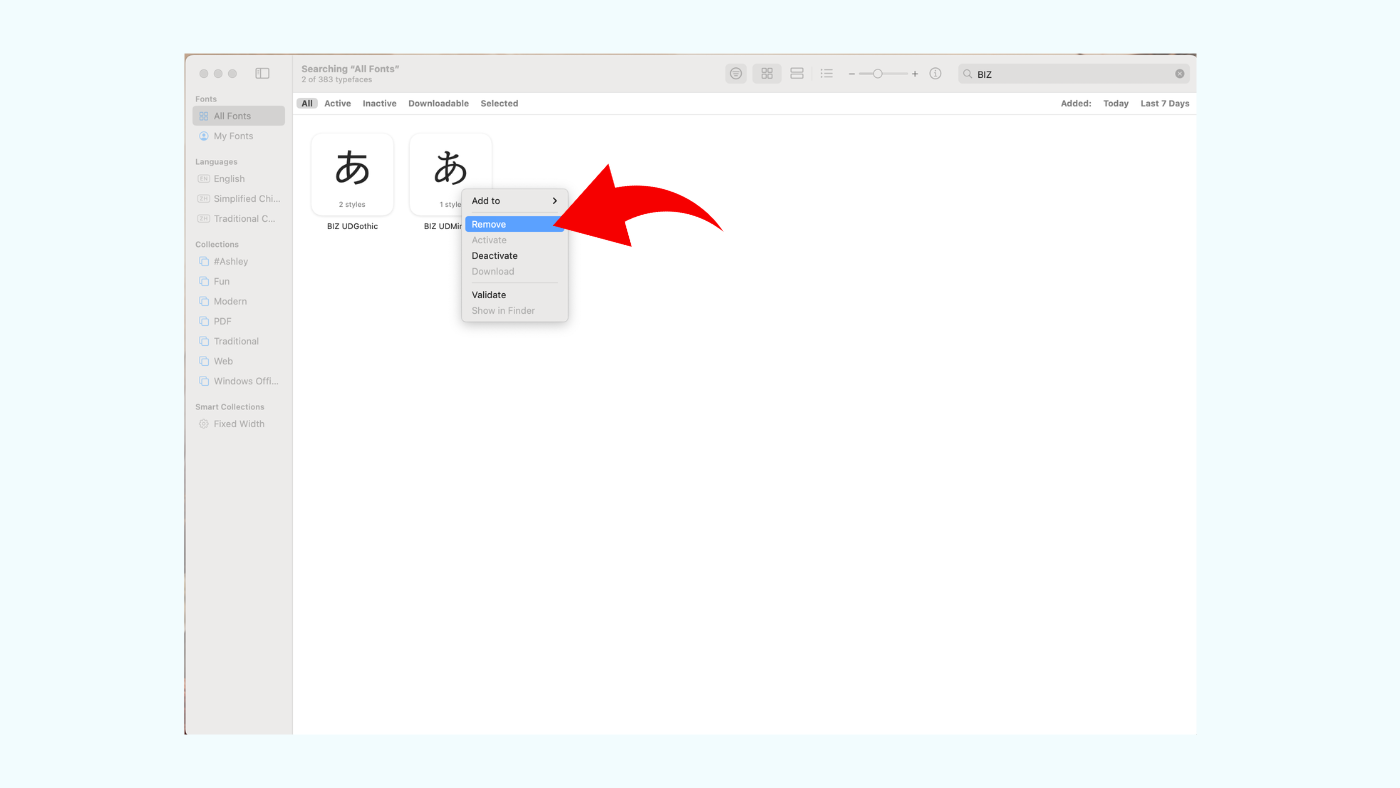
Right-click the font you want to remove. If you use a trackpad, you can Control-click instead. When the menu opens, select Remove.
Confirm the removal
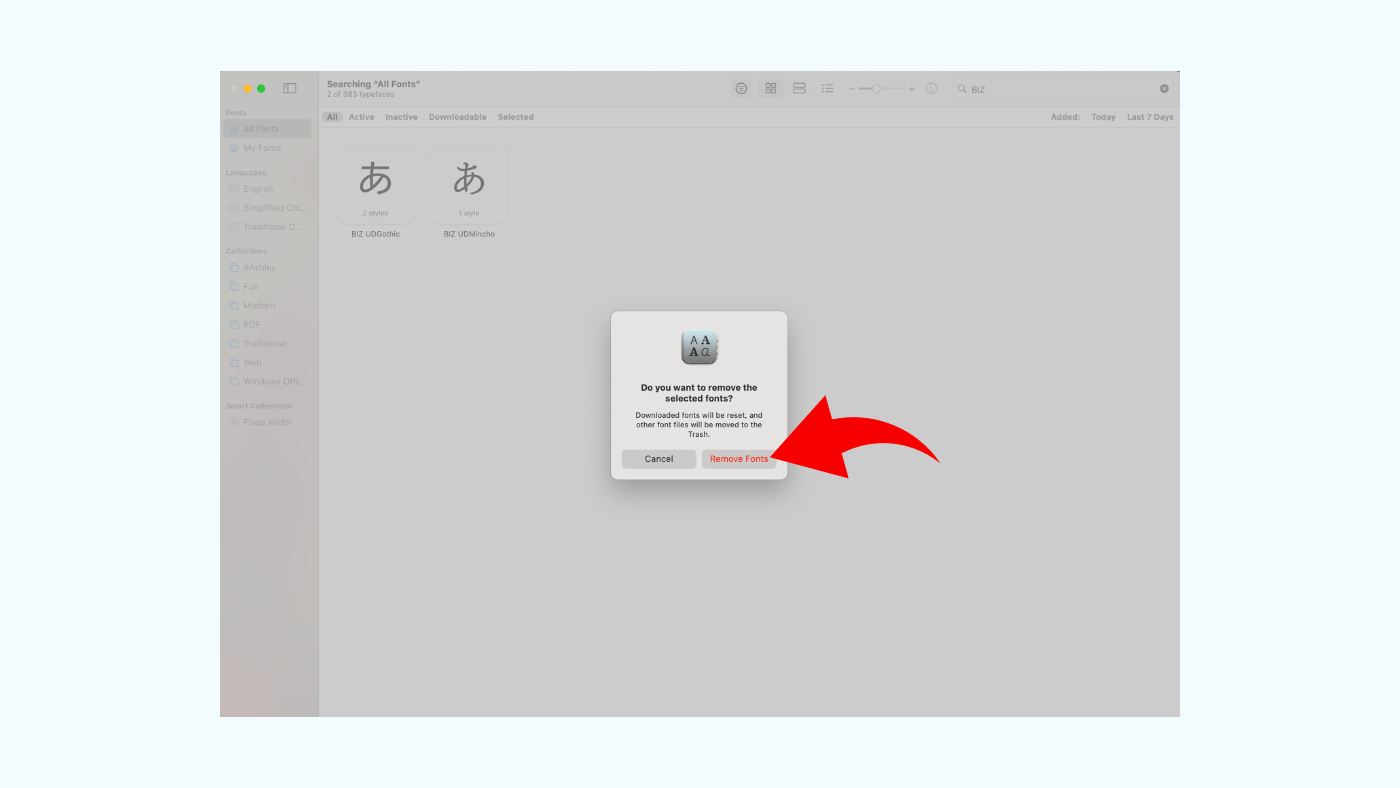
A confirmation window will appear. Select Remove Fonts or Remove Non-System Fonts, whichever appears, to confirm the removal.
Removed fonts are moved to the Trash. If the font was being used in another app, close and reopen that app so its font list can update.
If the font still appears in Font Book
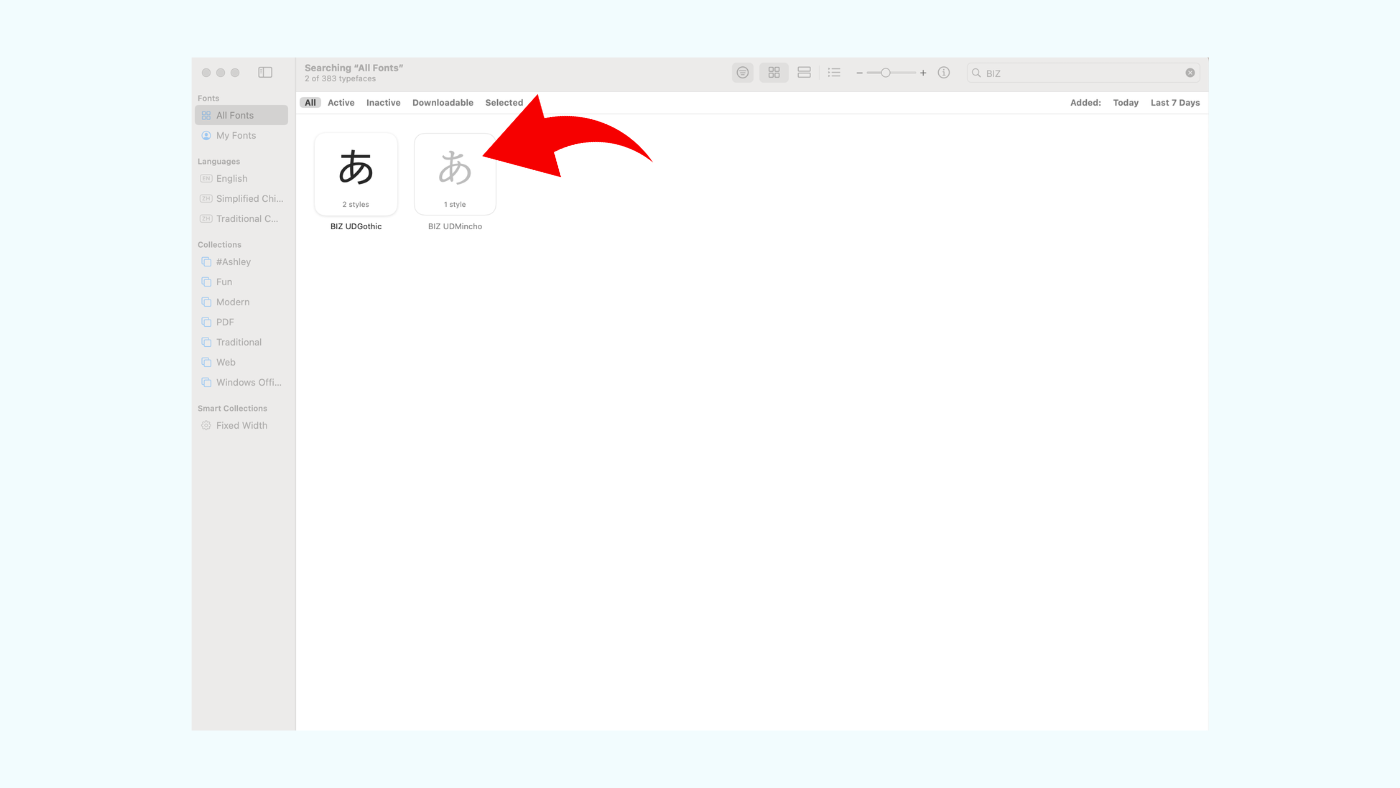
A dimmed or faded font may be deactivated rather than removed. Deactivated fonts remain installed on your Mac. A download button identifies an Apple-provided font that is available to download. Fading alone does not confirm that a font was removed.
Some fonts cannot be removed at all because they are required by macOS. These protected system fonts cannot be removed or deactivated in Font Book, and you will not see an option to remove them.